We all know how serious the ransomware threat is today and that unfortunately, there is no one magical solution to stop it. Protecting against ransomware requires a multilayer cybersecurity strategy, also referred to as defense in depth. This includes steps such as ensuring that all systems are up to date in their patching, enforcing MFA for email access, and not allowing local admin rights for standard users. There are also some group policy settings that you can use to incorporate into your strategy as well. Below are four that can help in different ways.
1. Enabling Network Protection
Network protection is a Windows features that helps prevent users from using an application inadvertently to access dangerous domains that may host phishing scams, exploits, ransomware payloads and other malicious content. It’s a component of Microsoft Defender for Endpoint and requires Windows 10 or 11 Pro (Pro and Enterprise) and Windows Server 2019+. The list of domains is supplied by Microsoft. Network protection blocks all HTTP and HTTPS traffic that attempts to connect to these contains. Think of it as web protection for non-browser applications.
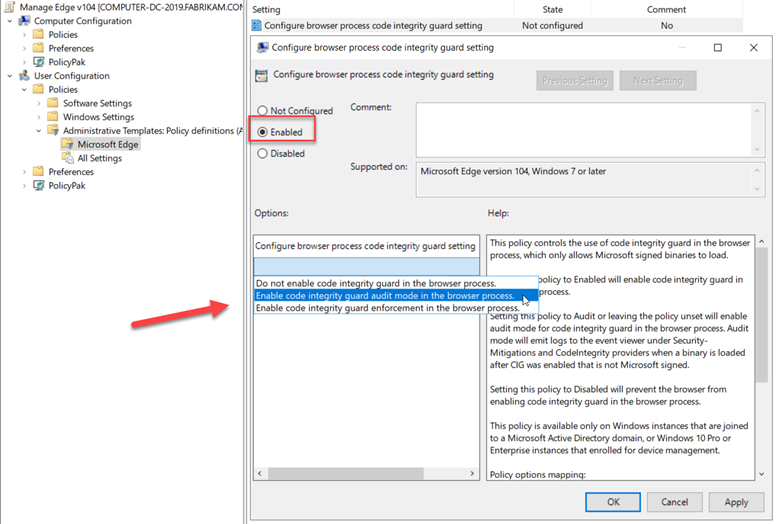
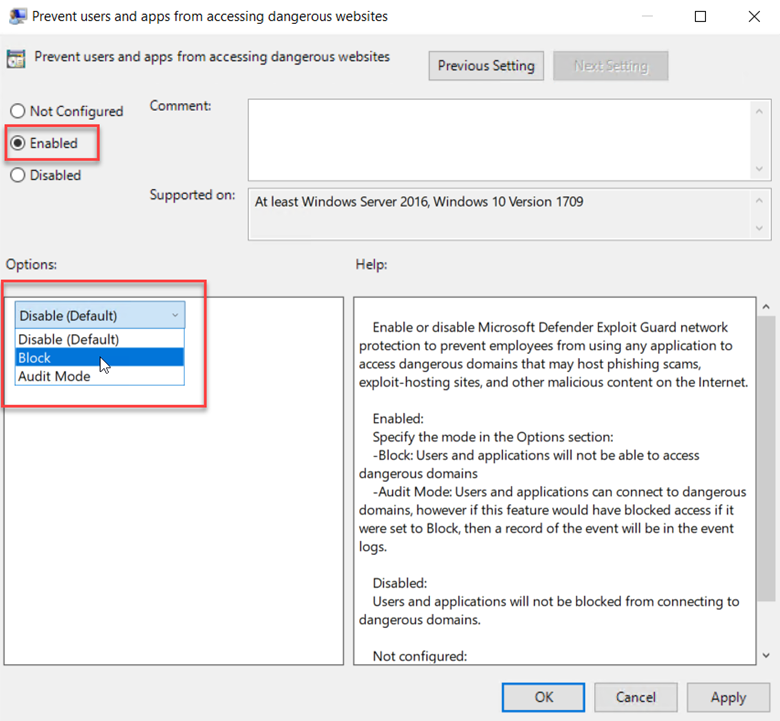
To enable this feature, create a GPO and go to Computer Configuration > Administrative Templates > Windows Components > Microsoft Defender Antivirus > Microsoft Defender Exploit Guard > Network Protection. There there are two policies for you to configure. The first step is to enable “This setting controls whether Network Protection is allowed to be configured into blog or audit mode” as shown below.

You then need to choose between Block and Audit. Block is self-explanatory in that users will not be able to access the domains in question. Audit mode allows users to still connect to the flagged domains but records the event into a log file. This allows you to get a read on what sites your users are utilizing before blocking them entirely. The screen shot below shows how to select between the two options.
2. Enable Controlled Folder Access
Controlled folder access was made available in Windows 10 and is supported in Window 11 as well as Server 2019 and 2022. It’s a component of Windows Defender Exploit Guard that prevents the data hosted in designated folders from being altered. In other words, if malware attempts to modify (encrypt) the files in these protected folders without authorization, the attempt is blocked, and an alert is generated. By default, certain system folders are protected such as a user’s Documents folder, Pictures, Desktop, etc. but you can also add folders as well. Note that the controlled folder access feature does not function if a third-party antivirus application is installed on the targeted system.
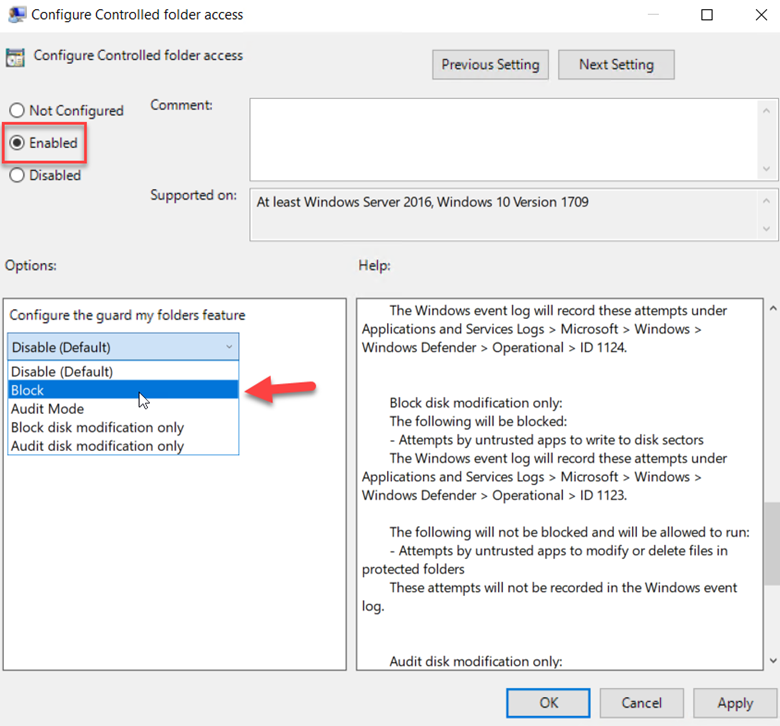
To configure Controlled folder access simply create a GPO and go to Computer configuration > Administrative templates > Windows components > Windows Defender Antivirus > Windows Defender Exploit Guard > Controlled folder access. Start by enabling “Configure controlled folder access” as shown below. You can choose to disable it, block it or choose Audit mode, both of which in the same fashion as Network Protection. You can also choose to only block or audit disk modifications which involve the writing to disk sectors by untrusted apps.
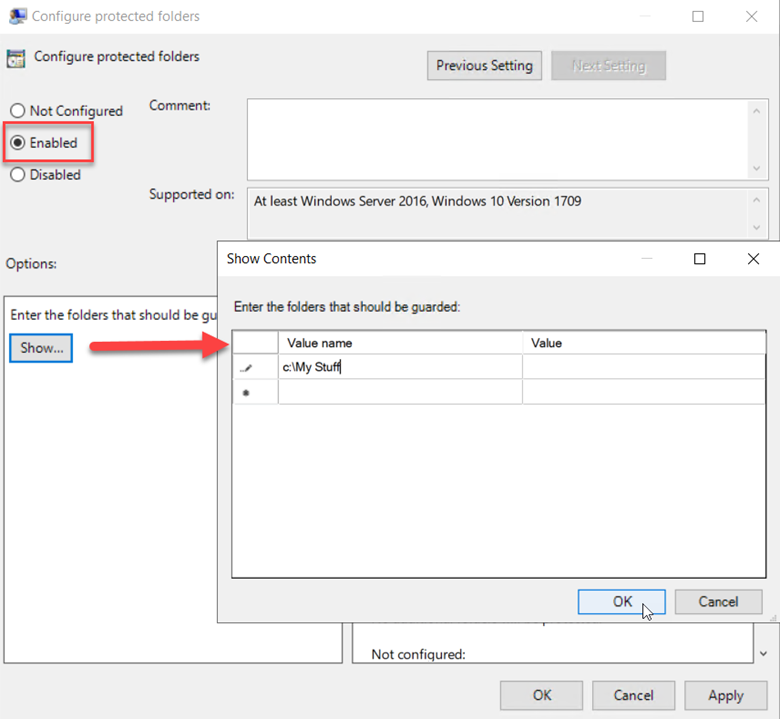
You can add additional folders to the list by clicking “Configure Protected Folders” and add the folders you want protected.
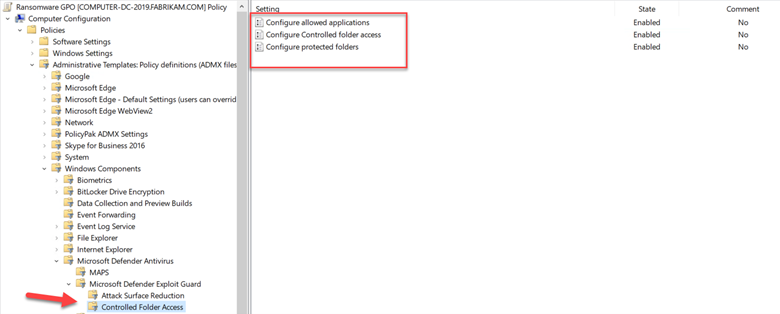
The end result will look like the example below. Note that you can also choose “Configure allowed application” to specify applications that are allowed to alter the data contained in the protected folders.
3. Disable Remote Desktop
Once a ransomware variant takes hold in your network, it then works to spread laterally across your IT estate. One of the ways is through remote desktop connection. That’s one of the reasons why Windows 11 has an account lockout policy enabled that only allows for 10 failed sign-in attempts over a 10-minute period. This blocks RDP brute-force attacks. Because some ransomware variants utilize RDP connection to spread, it’s a good idea just to disable it unless required.
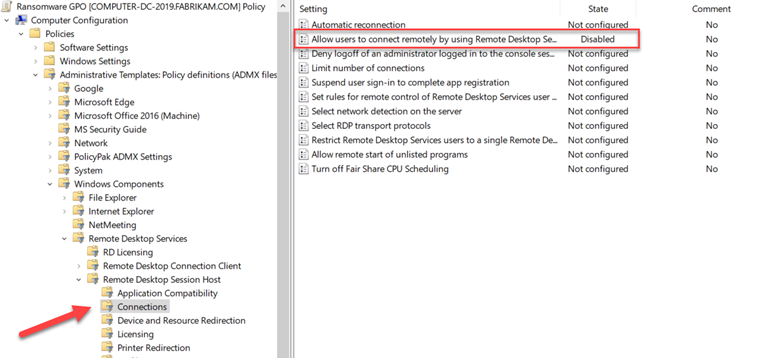
Create a GPO and go to Computer Configuration > Administrative Templates > Windows Components > Remote Desktop Services > Remote Desktop Session Host and disable “Allow users to connect remotely by using Remote Desktop Services” as shown in the screenshot below.
4. Show Hidden File Extensions
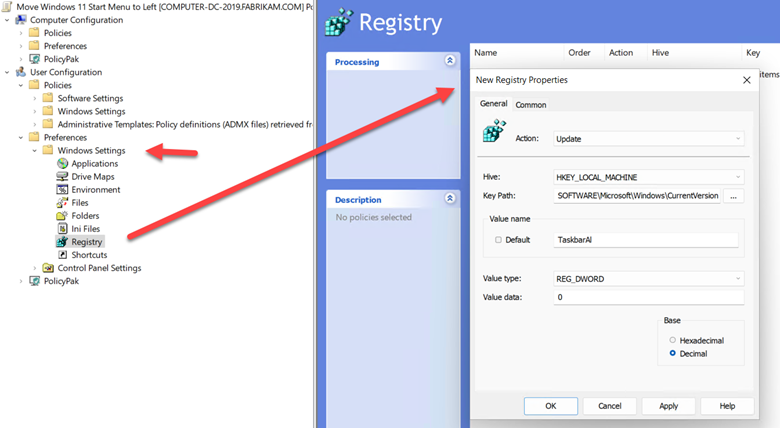
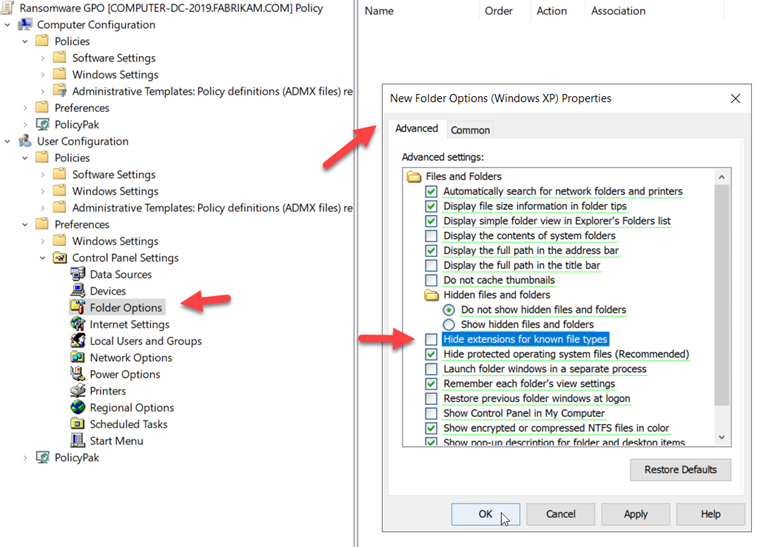
Cybercriminals use multiple nefarious tactics to get users to click on a malicious file. One of these methods includes the use of double file extensions. An example may be “letter.doc.exe” in which a user mistakes the file for a Word document if the executable extension is hidden. To ensure that file extensions are visible you can create a GPO and go to User Configuration > Group Policy Preferences > Control Panel Settings > Folder Options and make sure that “Hide extensions for known file types” is unchecked as shown in the screenshot below.
We’ve only touched the surface here. There are many other group policy settings available that can aid in preventing ransomware from bringing down your systems and we will cover more in the future.