Team:
I went to the doctor today. Nothing major. (Cough, cough.)
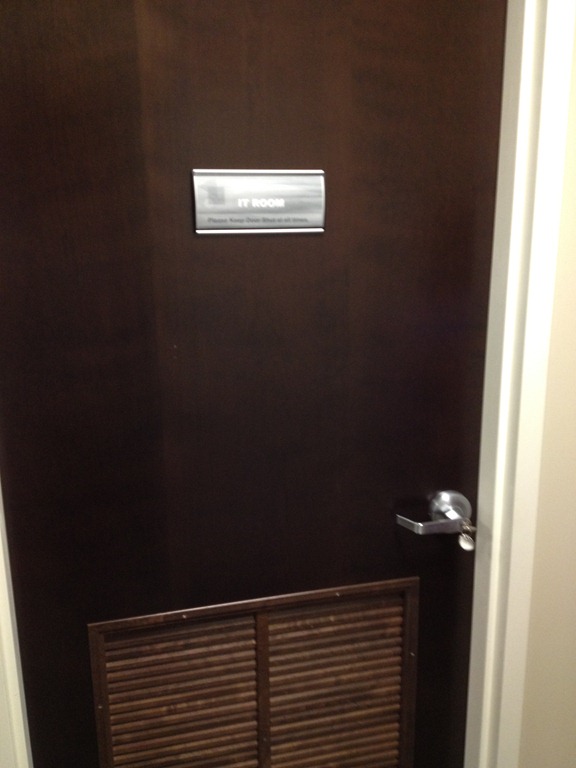
Anyway.. I’m walking down the hall, and I see this:

Look closely at the door name: Nope, nothing special in THERE.
Then, look toward the handle. Yep… KEY in the DOOR.
That’s okay. It’s only my personal medical records in there. No biggie, right? Sigh.
So, this got me thinking about, ya know.. being Evil.. which I am not.. and none of you are. (Little known fact: Everyone on GPanswers.com and PolicyPak.com goes thru a strict pre-screening regiment to ensure only "Non Jerkfaces" are getting these tips, thoughts, and updates.)
Anyhoo.. seeing this totally unlocked and MARKED door made me think about what it would take to be Evil if I wanted to.
And the most evil thing I could think of, was taking a drive out of a server. (No, I didn’t go in the door, and don’t know if that’s possible without a screwdriver.)
Some servers use RAID of course, which stripes the data across multiple drives. Could stealing just one drive mean I get anything? Well, with enough elbow grease I suppose I could go "block level" on that drive and see what I could find. Not easy, but, hey, possible…at least PLAUSABLE.
So this is making me think about how to protect against "Un-Jeremy stealing a server disk.
The answer is simple: Bitlocker.
If I stole a drive in the 60 seconds it took me to make the photo, I would have $100 in metal, and not much else.
I know people think of Bitlocker as a great idea for LAPTOPS. No brainer, sure.
But desktop and servers are equally vulnerable, honestly.. they’re just LESS PORTABLE.
Yes, you may have some physical security.. but.. that’s possibly circumventable. (How many times have you seen the cleaning crew in a bank branch late at night? Here in Philly at least, it’s ALL THE TIME ! No joke.)
So you could have "theoretically high" security, but still "circumventable security."
Bitlocker in Windows 8 and Server 2012 have some new features, which make me pretty happy. For my own systems, I use Bitlocker, but the big pain in the neck is WAITING for a drive to FULLY Bitlocker itself. Windows 8 now can use "Used Disk Space Only" .. which is awesome when I throw a new 1TB drive up.
For desktop and servers, there’s "Network Unlock" which also auto-unlocks machines as they boot (when they see that they’re on the network.) If they’re OFF the network, those drives, once again, become $100 pieces of metal.
So, in short, if you’re hesitant to consider Bitlocker for DESKTOPS and SERVERS.. reconsider, then start thinking about it.
I did.. in the 60 seconds it took me to take that photo.
PS: Class is filling in nicely in Tampa, FL. Smart, good looking NON-Evil people like you are joining up to learn more about managing Windows 7, 8, Server 2008 and 2012. Tampa, Florida, December.. Be there:
https://www.gpanswers.com/training/sign-up-now-live/
Q&A: Yes we take POs. No we cannot "save" a seat for you without a CC or PO. Price is right on the website. Yes, we do group discounts. Call Laura at 215-391-0096 for help with a PO or group. Yes you will get smarter. No it’s not boring. Yes, it’s me teaching. Yes, you will be tired and loving every second of it. Yes, you could possibly get a raise after taking the class because you’re smarter (no guarantees.)
Jeremy Moskowitz
GPanswers.com (Group Policy Community)
PolicyPak.com (PolicyPak Software)