MDM & GP Tips Blog

Nov 2022
02

Should You Delete or Retire Computers from Intune?

We often talk about adding devices to the Intune environment, but what about deleting them. What’s the best way to do it? There are several options. One option is to have inactive devices automatically removed from Intune using a cleanup rule. An inactive device means it hasn’t checked into Intune for a set number of days. You can configure the time window by going to Devices > Device clean-up rules and configuring the two required settings. You can input a number between 30 and 270. In the example below I have chosen 120 days as the cutoff. This means that day any device that has been inactive for 121 days or more will be deleted from Intune immediately. By clicking on the “View affected devices” link you can see the list of devices that will be deleted once the rule is saved. Device clean-up rules do not affect Android devices.


To Delete or Retire?

You can choose to delete or retire a computer from Intune at any time. What’s the difference? The answer is not much. Let’s outline what happens when a computer is retired.

  • The device is removed from the company Intune portal
  • Intune Endpoint Protection is removed
  • Intune deployed certificates are removed
  • Device configuration settings are no longer enforced or required so users can override them
  • The computer will no longer received its updates from the Intune service
  • Apps can no longer be installed from the portal and any Intune client software is removed
  • WiFi and VPN profile settings are removed

When you retire a device, the retire process will begin the next time the device checks in and it will be removed from Intune once the steps outlined above in the list are completed. Delete means that the computer is removed from the Intune “All devices” list immediately. However, the retire process will begin the first time the device checks in. In other words, Delete performs the same tasks that Retire does. It just hastens the removal of the device from the listings page. The exception is cleanup rules that do delete devices immediately but do not retire them.

To retire or delete a device, go to Devices > All devices and select the computer you want to delete. Then choose the appropriate action you want as shown in the screenshot below.


Oct 2022
17

How to Import ADMX and ADML Templates into Intune

Both Group Policy and Intune offer multiple Administrative Templates out of the box that provide settings for Microsoft operating systems and applications. Some third-party vendors provide ADMX and ADML templates that you can use to deploy settings for their products as well, but you must obtain them from the vendor and import them.  

Importing Administrative Templates into Group Policy

Importing third-party administrative templates into Group Policy simply requires that you paste the templates into the SYSVOL. Let’s say I wanted to manage settings for Zoom. I downloaded the templates and then placed them in the SYSVOL of one of my domain controllers as shown in the screenshot below. Note that you must also place the corresponding ADML templates into the appropriate language folder as well.

Then I use Group Policy Manager to create a GPO and the Zoom ADMX templates settings will appear automatically.

The Intune Importing Process

The process for importing ADMX and ADML templates into Intune is of course completely different. First off there are few limitations at present to keep in mind.

  • You can upload a maximum of 10 ADMX files
  • You can only upload one ADML file for each ADMX file
  • Only en-us ADML files are supported currently
  • Each file must be 1 MB or smaller
  • Some ADMX files may have dependencies that must be uploaded first

After the matching ADMX and ADML templates are downloaded, go to Devices > Configuration profiles and select “Import ADMX.”

Click the Import link and navigate to the matching ADMX and ADML files as shown in the screenshot below.

Once completed, the imported ADMX template will now be listed. You must allot ample time for the templates to upload before using them as shown below.

In this case, the upload failed. In the screenshot below I clicked on the link to find out the details of the error.

It says that an ADMX file reference file called NamespaceMissing: Microsoft.Policies.Windows. was not found. This is one of the gotchas I mentioned above. To fix this, you must first click the ellipsis to the right and delete it. Then you need to upload the Windows ADMX and ADML files. These files are in your SYSVOL folder by default.  Upload them the same way you did the Zoom template files.

Once you complete the import wizard, click refresh until you see that the Windows.admx is available. Then upload the Zoom template once again. This time the upload process shouldn’t fail, and you will see both ADMX files available as shown below.

Now you can create Configuration profiles that use your imported ADMX files. Go to Profiles > Create profile and choose Windows 10 and later as the platform and Templates as the profile type. Then select “Imported Administrative templates (Preview)“as shown below.

Then you can select and configure the settings you want in your policy.

Then complete the profile configuration process by assigning the profile to your designated users.


Jul 2022
19

Use Group Policy or Intune to Reclaim Disk Space with Storage Sense

Storage Sense is a disk cleanup feature found in Windows 10 and Windows 11 to free up drive space. When enabled, it serves as a silent assistant that automatically gets rid of items that you no longer need such as temporary files and items in your Recycle Bin. When enabled with its default settings it will run whenever the device is low on disk space. It can also delete neglected cloud backed content; a process referred to as Cloud Content Dehydration. This is especially valuable for users whose cloud storage far exceeds their local drives.

Using Group Policy to Manage Storage Sense

You can enable Storage Sense and configure settings using either Group Policy or Intune/MEM.  To enable it using Group Policy, create a GPO and go to Computer Configuration > Administrative Templates > System > Storage Sense and enable “Allow Storage Sense” as shown below.

Once enabled, Storage Sense will delete files from the Recycle Bin by default after 30 days. You can modify this period by enabling “Configure Storage Sense Recycle Bin cleanup threshold” and choose any digit between 0 and 365. A value of zero means that the files will never be deleted. You would do this if you wanted to enable Storage Sense but disable its Recycle Bin capabilities. The screenshot below shows the available policy settings.

Storage Sense also deletes Temporary files by default as well so there is no need to enable the “Allow Storage Sense Temporary Files cleanup” but you do need to specifically disable it if you don’t want it utilized.

One folder that Storage Sense doesn’t clean up by default is the Downloads folder. All those downloads become forgotten over time and can quickly add up, especially if it includes large ISO files. You can turn on this feature by enabling the “Configure Storage Storage Downloads Cleanup Threshold” and once again choosing 0 to 365 days. (BTW that isn’t a typo, the setting does repeat the world storage).

Next, lets enable the “Configure Storage Sense Cloud Content Dehydration Threshold” setting. Here you will input the minimum number of days you want a cloud-backed file to be unopened before being deleted. I chose 90 days in the screenshot below.

Finally, there is the “Configure Storage Sense Cadence” setting. By default, Storage Sense will run whenever it detects low disk space, but you can force it to run on a scheduled cadence using this setting as shown in the screenshot below.

Intune/Endpoint Manager and Storage Sense

You can also manage Storage Sense using Intune/MEM as well.  Create a Configuration Profile and select Windows 10 and later as the platform and Settings as the Profile type. After naming the configuration profile, do a search for Storage Sense and select Storage as the category once found. Then choose the desired settings you want to configure. The process is illustrated in the screenshot below.

Once the settings are configured, complete the wizard, and assign to the group your designated group(s). Now you won’t have to worry about forgotten files taking up footprints across your PC fleet.


May 2022
23

Use Intune or GPOs to Move the Windows 11 Taskbar to the Traditional Left

Users are creatures of habit. They expect things a certain way and when they aren’t, they often call the help desk. For years, users have been accustomed to the Windows taskbar and Start button tucked in the left-hand corner of the screen. Thus, the default position of the Windows 11 start menu in the center may throw some for a loop. There is an easy way to fix this as an individual user using the Personalization tab in the Settings menu. To do this for all your users requires a policy and here are two ways to do it.  Each involves making a change to the registry.

Group Policy Preferences

We need to add a value called "TaskbarAl" that will reside in the following registry key path:

HKEY_CURRENT_USER\SOFTWARE\Microsoft\Windows\CurrentVersion\Explorer\Advanced

It will be assigned a value “0”.

Using the Group Policy Management Editor go to User Configuration > Preferences > Registry.  Right click and choose New > Registry Item.  Then fill out the property fields as shown in the screenshot below.

If you want to deploy the setting using Microsoft Endpoint Manager you will have to do it using a PowerShell script.  There are multiple ways to write the necessary script but below is one approach. This script format makes it easy to add other Start Menu and Taskbar values to the same registry location.

# Move the Windows 11 Taskbar to left

#_____________________________________________________________________________________

$registryPath = "HKCU:\Software\Microsoft\Windows\CurrentVersion\Explorer\Advanced"

$Al = "TaskbarAl" # Shift Start Menu Left

$value = "0"

New-ItemProperty -Path $registryPath -Name $Al -Value $value -PropertyType DWORD -Force -ErrorAction Ignore


Paste the script into PowerShell ISE and save it. Using Microsoft Endpoint Manager go to Devices > Scripts.  Click Add and select Windows 10 and later.  Name the policy and upload the script in the next screen as shown in the screenshot below.

Now assign the script to the designated group(s) and complete the wizard.  Be patient because it can take a little while for the script to force the bar to move over. It may seem like a trivial matter but it may save you some support calls.

May 2022
09

How to Filter Windows 11 Machines with Intune

Unless you are an SMB, you are probably going to phase in your Windows 11 upgrade over time.  That means that you will have to manage both versions until the upgrade is complete, which might require you to manage their settings or application deployments differently.  If you are using Intune to manage your Windows machines, you can use filtering to reduce the complexity of doing so. 

You can use Intune filters to target configurations, policies, and applications to specific device attributes such as Manufacturer, Model and OS version.  In this case we will create two filters that each target a different OS version.  Using Microsoft Endpoint Manager go to Intune > Tenant administration > Filters and create a new filter and name it as shown below.

Create a rule and select osVersion as the property, StartsWith as the operator and 10.0.2 as the value which I did myself in the screenshot below.  Then finish out the wizard to complete the filter.

Now create a second filter.  There are a couple of options when creating these filters.  You could use the same approach as the previous filter and match it with the Windows 10 value.  In this example, we chose a different approach and instead used the NotEquals operator, typing in 10.0.2 as the value.  This means that any Windows version other than Windows 11 will be included in this filter.

Now that you have the filters created, you can start applying them when needed.  In the example below, I have created a configuration profile that I have assigned to a computer group.  The group is made up of both Windows 10 and Windows 11 machines.  Because I want this profile to only apply to Windows 11 machines, I will click the filter link and choose “include filtered devices in assignment” and select the Windows 11 filter I created earlier.

Finish out the wizard and the configuration profile will now only target Windows 11 devices.  Those familiar with Group Policy will note the similarity to WMI filtering.  Once you upgrade all your Windows 10 devices, simply delete its designated filter.   


May 2020
26

How to Kill PUA on your Windows 10 Devices using Group Policy, Powershell and Intune

Few things in this world are black and white and that includes software you download. 

There is a lot of "gray-ish" stuff residing on computers today.  A good example is software that comes bundled with the computer or was installed by another software application of a different vendor. 

Most of the time these applications aren’t something you want in the first place.  Other examples include advertising software or evasion software that actively tries to dodge the detection of your cybersecurity tools.   While these software files may not pose a direct threat to your computer in the same way that malware, Trojans and other types of malicious software do, these unwanted applications can impede the performance of your endpoints.  These unwanted software servings are referred to as Potentially Unwanted Applications (PUA).  A PUA is an application that has a poor reputation.  These applications can serve as a time consuming distraction of cleaning up these files.  Over time, these applications can increase the risk to your network. 

Windows 10 Defends Against PUAs

Windows 10 (Professional and Enterprise editions) can detect and block possibly harmful third party and unwanted applications using Windows Defender and does so without requiring Defender ATP or Enterprise licenses.  When activated, the PUA security feature looks for certain file structures and conditions that include the following:

  • The file is being scanned from the browser
  • The file is in a folder with "downloads" in the path
  • The file is in a folder with "temp" in the path
  • The file is on the user's desktop
  • The file does not meet one of these conditions and is not under %programfiles%, %appdata% or %windows%

Should these conditions be met, the file in question is then quarantined and not allowed to be installed until approved. 

Using PowerShell to Enable PUA

You can use PowerShell to enable PUA within Windows Defender. 

The command options are as follows:

Set-MpPreference -PUAProtection Enabled

Set-MpPreference -PUAProtection AudiMode

The PS command will add and modify the DWORD value in the protected registry key as is shown below.

HKEY_LOCAL_MACHINE\SOFTWARE\ Microsoft\Windows Defender\MpEngine\MpEnablePus.

And assigns one of the following values.

  • Disabled: 0 (Does not block PUAs)
  • Enabled: 1 (Blocks PUAs)
  • Audit Mode: 2 (PUA events are reported in Windows Event Viewer.  PUAs will not be blocked however)

Of course, you can make the changes directly in the registry itself.

The end result is as follows:


Enabling PUA with Group Policy

For domain-joined machines, you can enable PUA protection through Group Policy.  Simply create a GPO and go to Computer Configuration > Administrative Templates > Windows Defender Antivirus and enable “Configure protection for potentially unwanted applications.”

Then choose which your desired option:

You can also use Configuration Manager to deploy the setting as well.

05:07

Enabling PUA with Microsoft Endpoint Manager (Intune)

You can configure the Defender/PUA Protection CSP for your Intune enrolled devices.  You can either create a configuration profile or use the preferred method of enabling and configuring a security baseline.  To create a configuration profile choose Windows 10 as the platform and Device restrictions as the profile type. 

To deploy PUA using a security baseline, go to Endpoint Security > Security Baselines > Microsoft Defender ATP baseline > Profile configure the “Defender potentially unwanted app action” setting as is shown below.

Enable PUA in Chromium-based Microsoft Edge


The new Edge browser (version 80 and greater) contains its own PUA protection ability.  Go to your browser settings and select Privacy and services.  Then enable the “Block potentially unwarned apps” as is shown in the screenshot below.

You can also deploy this Edge setting using Group Policy as well.  Simply create a GPO and go to Computer Configuration > Administrative Templates > Microsoft Edge > SmartScreen settings and enable “Configure Microsoft Defender SmartScreen to block potentially unwanted apps.”

To enable the same setting using Microsoft Endpoint Manager, create a configuration profile and choose Windows 10 as the platform and Administrative Templates as the profile type.  Then go to Microsoft Edge > SmartScreen Settings and enable “Configure Microsoft Defender SmartScreen to block potentially unwanted apps."

You should enable these PUA tools as a part of your multilayer security strategy.  Hardening your desktop devices and reducing their attack surface exposure is critically important.  Another way to stop PUA (or, really any unwanted file download) is application control via PolicyPak Least Privilege Manager.  You can check it out here.


Mar 2020
02

Block regedit with Intune

The last thing that standard users need on Windows 10 machines is access to REGEDIT.  It is one of the first things we block access to with Group Policy.  Surprising though, there is no native way in Intune to block it however.  The good news is that you can do it by creating a custom profile in Intune or any MDM.  I have included the information you need to create it below.  Now you can be rest assured that users won't be causing issues and circumventing policies by messing with the registry.

OMA-URI:  ./Vendor/MSFT/AppLocker/ApplicationLaunchRestrictions/IntuneEdu/EXE/Policy

Data Type:  String (XML file)

<RuleCollection Type="Exe" EnforcementMode="NotConfigured">

        <FilePathRule Id="fd686d83-a829-4351-8ff4-27c7de5755d2" Name="(Default Rule) All files" Description="Allows members of the local Administrators group to run all applications." UserOrGroupSid="S-1-5-32-544" Action="Allow">

          <Conditions>

            <FilePathCondition Path="*" />

          Conditions>

        FilePathRule>

        <FilePathRule Id="ce9d9fd5-d765-48df-b87b-e1bafd5653ed" Name="All files" Description="Allows members of the Everyone group to run applications that are located in any folder." UserOrGroupSid="S-1-1-0" Action="Allow">

          <Conditions>

            <FilePathCondition Path="*" />

          Conditions>

                        <Exceptions>


        <FilePublisherCondition PublisherName="O=MICROSOFT CORPORATION, L=REDMOND, S=WASHINGTON, C=US" ProductName="MICROSOFT® WINDOWS® OPERATING SYSTEM" BinaryName="REG.EXE">

          <BinaryVersionRange LowSection="*" HighSection="*" />

        FilePublisherCondition>

                Exceptions>

        FilePathRule>

     RuleCollection>


Mar 2020
01

Block CMD prompt with Intune

Group Policy admins have been blocking access to command prompt for standard users since the beginning.  That is why it is frustrating for MDM admins having no native way in Intune to block it in the same fashion of Group Policy.  Well in actuality, you can block the cmd prompt, it just takes a custom profile, which is something that not everyone likes to do much.  Below is how you set it up so feel free to use the settings.  

OMA-URI:  ./Vendor/MSFT/AppLocker/ApplicationLaunchRestrictions/IntuneEdu/EXE/Policy

Data Type:  String (XML file)

Here is the XML code to paste in:

<RuleCollection Type="Exe" EnforcementMode="NotConfigured">

        <FilePathRule Id="fd686d83-a829-4351-8ff4-27c7de5755d2" Name="(Default Rule) All files" Description="Allows members of the local Administrators group to run all applications." UserOrGroupSid="S-1-5-32-544" Action="Allow">

          <Conditions>

            <FilePathCondition Path="*" />

          Conditions>

        FilePathRule>

        <FilePathRule Id="ce9d9fd5-d765-48df-b87b-e1bafd5653ed" Name="All files" Description="Allows members of the Everyone group to run applications that are located in any folder." UserOrGroupSid="S-1-1-0" Action="Allow">

          <Conditions>

            <FilePathCondition Path="*" />

          Conditions>

                        <Exceptions>

                    <FilePublisherCondition PublisherName="O=MICROSOFT CORPORATION, L=REDMOND, S=WASHINGTON, C=US" ProductName="MICROSOFT® WINDOWS® OPERATING SYSTEM" BinaryName="CMD.EXE">

          <BinaryVersionRange LowSection="*" HighSection="*" />

        FilePublisherCondition>

                Exceptions>

        FilePathRule>

     RuleCollection>

Jun 2019
18

A Short Tour of the Intune Customer Adoption Pack

Intune has come a long way since its inception and now offers a lot of great features to manage your organization’s mobile and Windows 10 devices.  The MDM approach to device management is a real change from years ago in which computing devices were either managed through the traditional AD joined domain model or were simply allowed to operate independently at the discretion of the user. 

Intune continues to introduce cloud based services that streamline and secure your devices, but users are often slow to accept changes into their environment.  In order to better educate users about the importance and need for device management and mobile security, Microsoft just recently updated the Intune Customer Adaption Pack in order to make the change in approach more palatable and decrease the transition time of Intune enrollment.  The adaption pack is especially valuable to organizations that previously did not require mobile devices to be enrolled for work access.

What’s in the Intune Customer Adaption Pack

The Adaption Pack is essentially a comprehensive communication plan that sets out to accomplish three objectives:

  • Education users in how to enroll their particular devices in Intune
  • Reassure users about their privacy concerning what type of device data is shared with IT
  • Explains the safeguards in place to protect user privacy and company resources

The adaption kit is suited for IT admins, management and trainers to educate, prepare and guide their users for the enrollment process.

You can download the Intune Adaption Pack here.

IT admins, management, and trainers

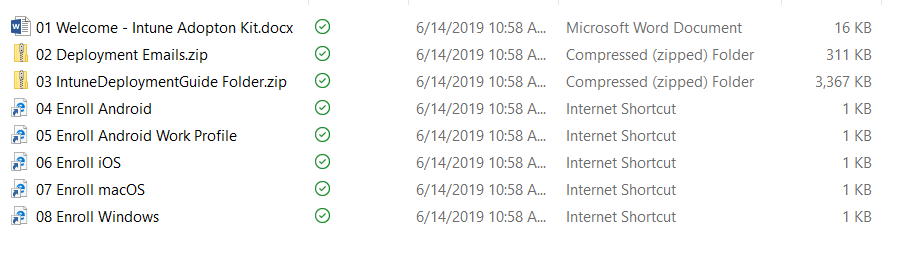
The link downloads a zip file that includes a variety of documents, videos, posters and templates that can be leveraged to spread Intune adaption throughout your organization.   The enclosed contents are shown in the screenshot below.

The Welcome document outlines what is in the adaption kit.  The kit includes two email templates that can be used to communicate with your users about the coming transition to Intune.  You can use them as written or customize them according to your needs.  An example of email #1 is shown below.

As part of the , all employees worldwide will soon transition to Microsoft Intune, a unified mobile device management platform. Intune enables you to work productively and securely from anywhere, at any time and across all of your devices. All other mobile device management platforms used worldwide to secure documents, devices, and corporate data will be retired.

The email goes on to explain some of the benefits and expectations of Intune as well as a schedule of the coming steps that they will be asked to complete at the appropriate time.  This opening email also provides an opportunity to showcase any other new services whose access will be granted on devices managed by Intune.  These required actions are then outlined in the second email template that also reinforces the benefits and strategic reasons for the migration and provides users a timeline for the outlined process. 

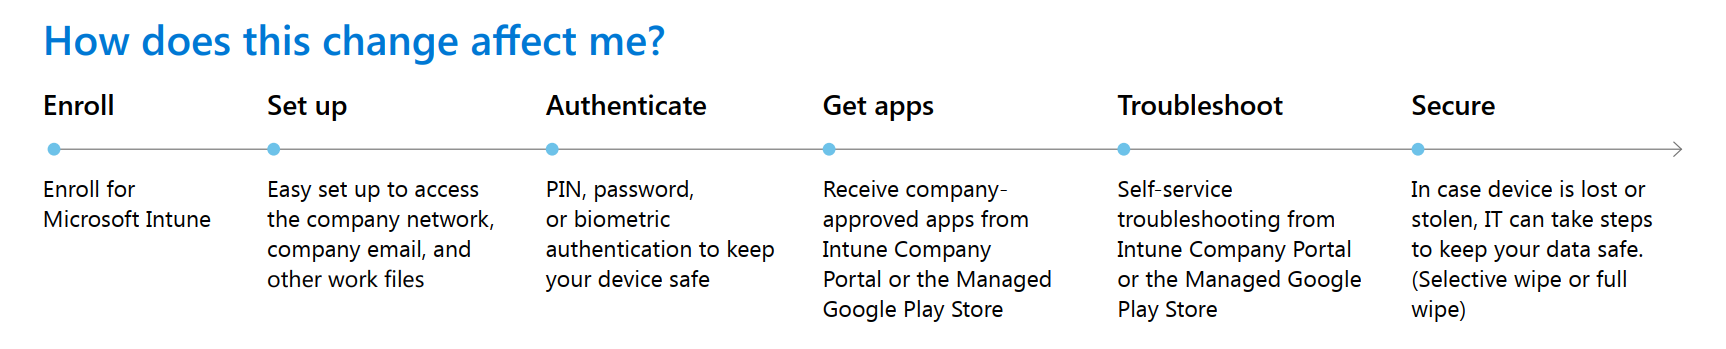
The Intune Deployment Guide provides a wealth of information for your users that is compressed into two palatable pages that they can quickly read and apprehend.  The guide also includes a Word version that allows you to customize and include your internal resources and contact information.  Some of the topics outlined include:

  • What information about their personal devices can and cannot be seen by IT?  This includes a link to the Intune privacy policy. 
  • How internal IT will use the company portal or app store to install work apps
  • What users can do if their mobile device is lost or stolen
  • Security steps IT can take to secure data residing on enrolled devices
  • Intune enrollment links for each applicable operating system

An example of the guide is shown below.


Training Videos

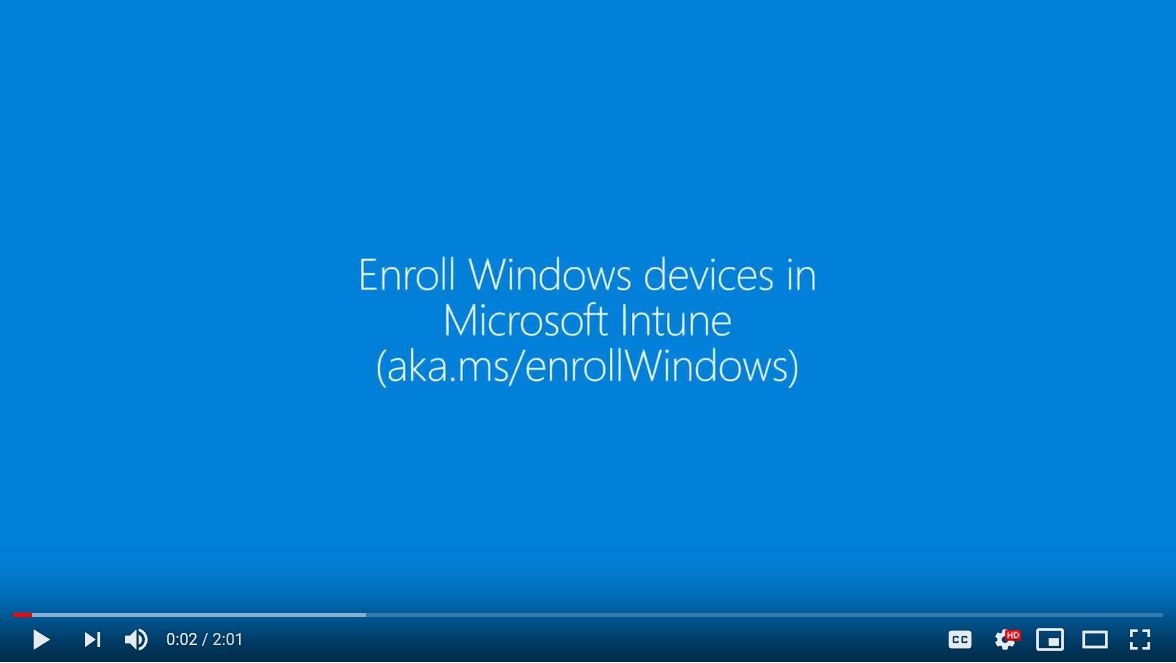
If you’ve had concerns about how to train your users to complete the enrollment process, the enclosed videos in the Adaption Pack will be a welcome tool.  The videos are step-by-step YouTube videos that show users how to easily enroll their devices in Intune.  Below is a screenshot of the Windows 10 video.

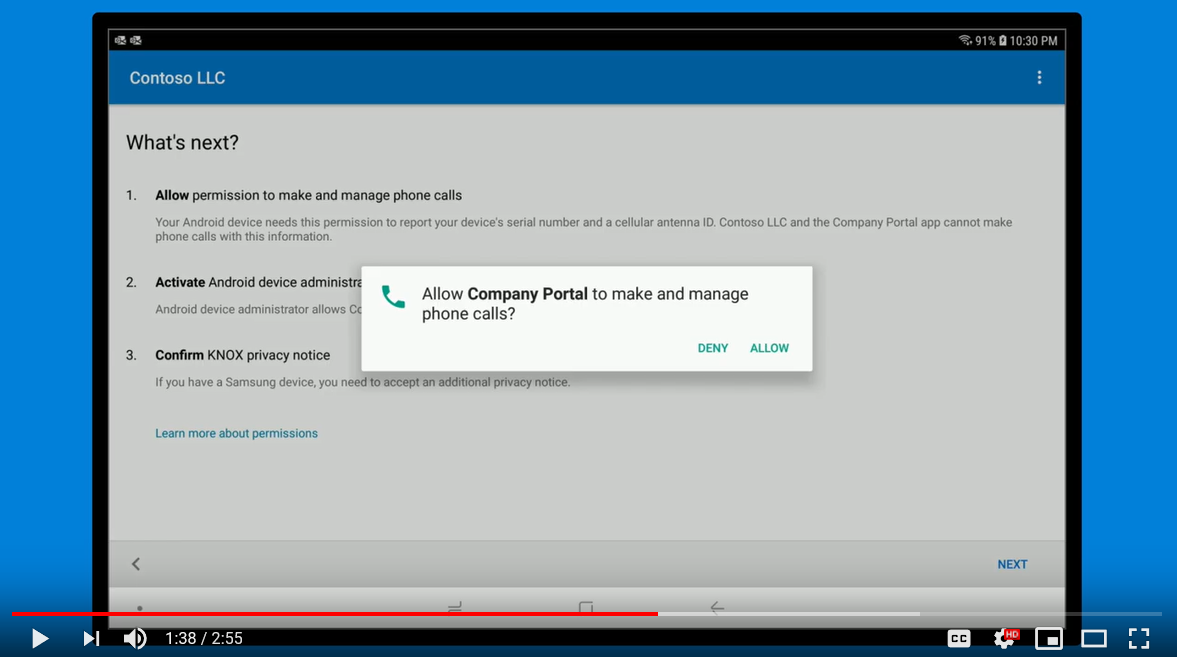
Two videos demonstrate how to either enroll an Android device for full management or enroll for Work Profile management.  An example of the Android device management is shown below.

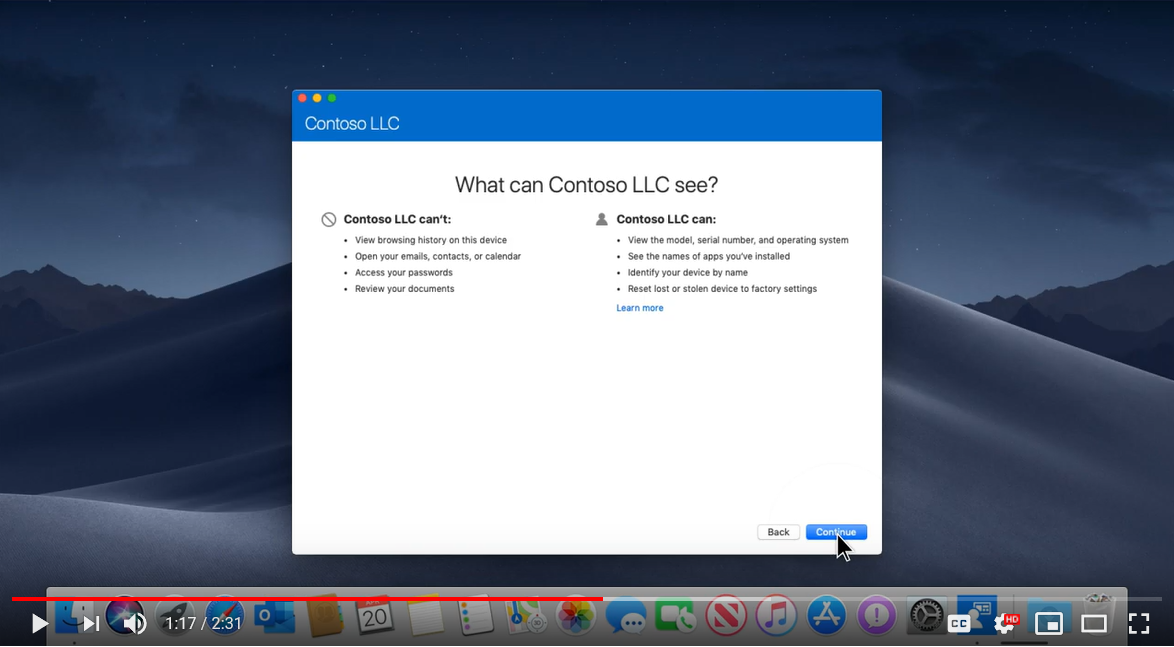
The videos not only provide step-by-step directions on how to complete the enrollment process, but also summarizes again what information Intune has access to when it comes to user devices.  An example of this is shown in the MacOS video.  Note that there is also a separate video concerning iOS devices as well.

A Great Tool to Assure a Smooth Transition

The Intune Customer Adaption Kit gives you out-of-the-box training tools to educate your users about why Intune enrollment is so important.  It can help ensure that all targeted devices are enrolled quickly without the constant prodding of your users asking “what to do.”  By effectively communicating the necessary messages and information to your users, you will be able to begin enforcing compliance through conditional policies for all of your targeted devices.

Mar 2019
21

Co-Management Today with SCCM and Intune

While we used to actively block devices from registering with Intune and SCCM or Group Policy at the same time, we more than welcome this duality of management capabilities today.  Outside of cloud-only enterprises, Microsoft not only allows, but encourages the practice of allowing settings management from multiple sources. Microsoft refers to this current practice as co-management. 

The advantage of Hybrid MDM was that it allowed you to manage SCCM exclusive and MDM exclusive devices from a single console.  Essentially it was a a product of convenience more than anything.  With co-management, the two work in cohesion.  Clients can now have the Configuration Manager client installed and be enrolled in Intune.  For those organizations that have a considerable investment in time and resources in SCCM, Co-management adds greater functionality to your SCCM structure by incorporating cloud functionality.

Co-management requires version 1710 or later and requires all involved Windows 10 devices to be Azure AD-joined or joined to on-premise AD and registered with Azure AD.  For new Windows 10 devices, you can simply join them to Azure AD, enroll them in Intune and install the Configuration Manager client for co-management ability.  When it comes to Windows 10 devices that already have the Configuration Manager client installed the path is more complex, but basically requires you to setup hybrid Azure AD and enrolling them into Intune. Whichever way you get there; the end result is that you get the best of both worlds. 

Co-management is about more than just increased functionality however.  It gives IT administrators the flexibility to choose which management solution works best for their organization, devices and workloads they have to manage.  This facility of choice is exemplified in the screenshot below that shows the workloads tab of the SCCM admin screen.  As you can see, with co-ecomanagement you can switch the authority from Configuration Manager to Intune for select workloads.  This puts the SCCM admin in charge of which tool will manage what policies by simply moving the slider to the selected choice.

Note the presence of the “Pilot Intune” option.  As MDM is relatively new to most admins, Pilot Intune gives you the ability to pilot things first in order to ensure everything operates as expected.  Once results are confirmed, you can throw the switch all the way.  Eventually, Microsoft hopes that all the siders will be moved to the right, with everything hosted and managed in the cloud.  Those who are intimidated by SCCM might say that’s not a bad thing.