How to Use Scope Tags for Intune Configuration Profiles
How many times has this happened to you? You go about creating a new configuration profile using the Microsoft Intune Admin Center. You complete the setting creation process and now want to assign the profile to the designated groups. But before that, the wizard prompts you about Scope Tags as shown in the screenshot below.
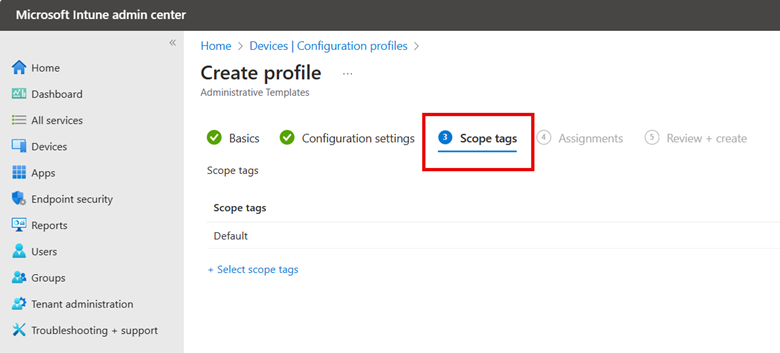
Like other Intune administrators, you might often bypass scope tags by clicking Next, occasionally wondering about their purpose. Scope tags are vital for partitioning and controlling access to Intune resources, such as profiles, apps, and policies, to enable delegated administration. They allow for the classification of resources by department, function, or location, facilitating more efficient resource organization. This ensures administrators can readily manage resources relevant to their specific organizational segments. Although granular access control through scope tags might seem excessive for small to medium-sized organizations, it's incredibly beneficial for larger ones, enhancing security and compliance by restricting administrators' access only to their designated resources. This reduces the likelihood of unauthorized access or alterations to crucial settings.
Create Your Scope Tags
Start by generating your scope tags, envisioning them as segmentation tools that define which admins have access. Imagine a national company with offices across various regions. For this example, you'll create scope tags specifically for the administrative team stationed in this office that is responsible for managing the profiles and policies exclusive to the East Coast office. To configure this arrangement, you need to:
- Create a member group called East Coast Admins which will contain the all admins of the east coast office that will have permission to manage policies and profiles for users and devices within the allotted scope.
- Create a scope tag that will contain the east coast admin member group.
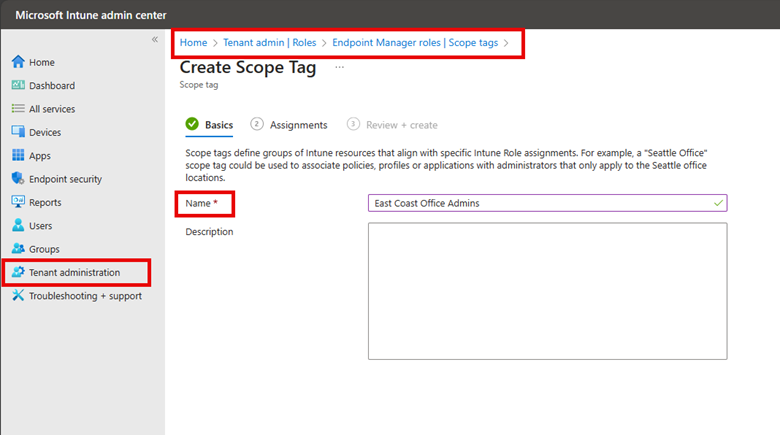
In this case I already have my east coast admin group. To create the scope tag using the Microsoft Intune Admin Center navigate to Tenant Administration > Roles > Scope Tags and create a scope tag and name it as shown below.
The next step is to add member group to the scope tag as shown here:
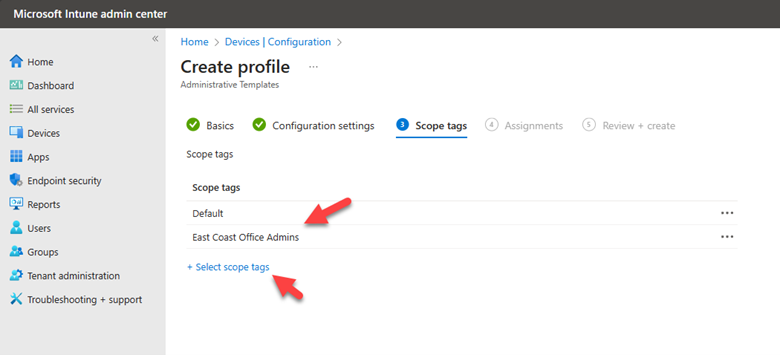
Next, finish the wizard to create your scope tag. With the scope tag established, you can apply it as necessary. The final step involves creating a configuration profile. When you reach the Scope Tag section this time, add the scope tag you've just created.
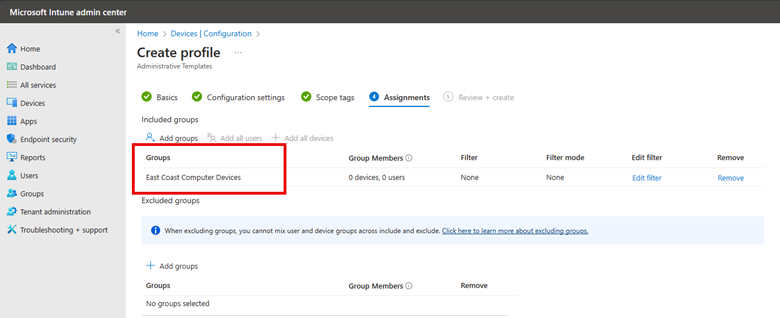
Then I will assign the device group that configuration profile will be applied to:
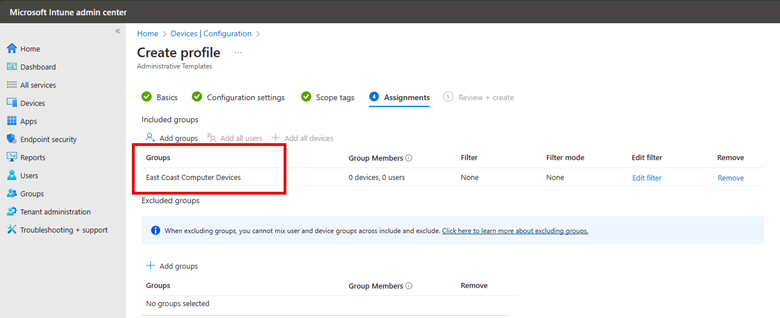
After finishing the wizard, I've set up a configuration profile targeted at East Coast computer devices. This allows East Coast admins to manage these devices specifically, utilizing the scope tag for focused oversight.


Comments (0)