How to Setup Printing in the Cloud Using Universal Print (Part 3)
So, in our last article, we talked about registering printers with the Universal Print portal. We registered a couple of printers using the Universal Print Connector and then shared them to designated users through group assignment. Users can then browse the list of shared printers that they have access to and pick the appropriate printer according to factors such as location or printing capabilities. While this is fine for users needing to send something to a printer they normally don’t use, it’s easier for users to directly install printers on client machines. This is done by creating an Intune policy.
Creating a Printer Policy
All users that will be receiving the printer policy must be assigned a universal print license as mentioned in Part 1 of this series. You also need the Printer Administrator role to create the policies and the target computers must have Windows 10 or Windows 11.
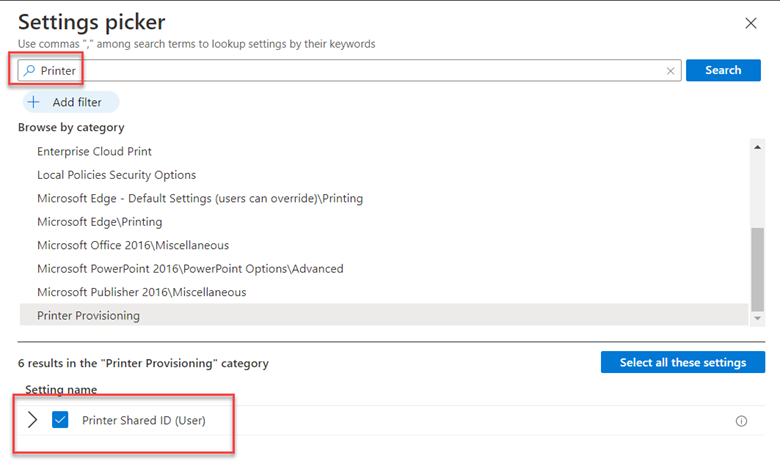
Using MEM go to Intune > Devices > Configuration profiles and create a new profile. Choose Windows 10 and later as the platform and Settings catalog as the Profile type. Name the policy, click “Add settings” and do a search for the word “printer” as shown below. Scroll down and select Printer Provisioning and select Printer Shared ID User.

You will need three bits of information about each printer you want to install. You can access this information from the overview section of each printer in the Universal Print portal as shown below.

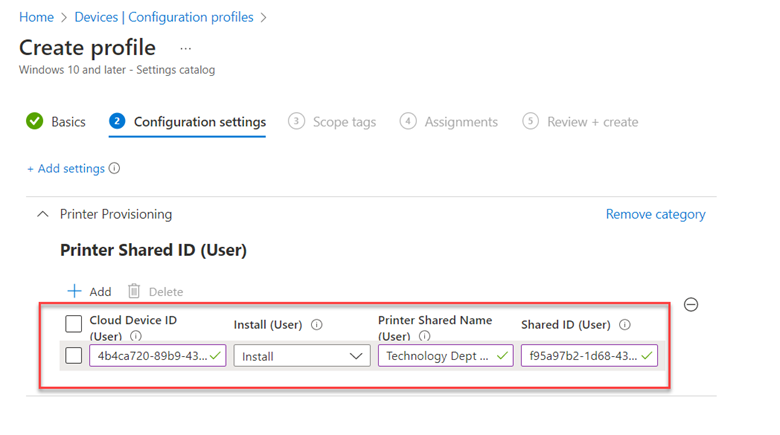
Next, Input the Printer ID, Printer Share Name and Share Id in their designated boxes as shown below.

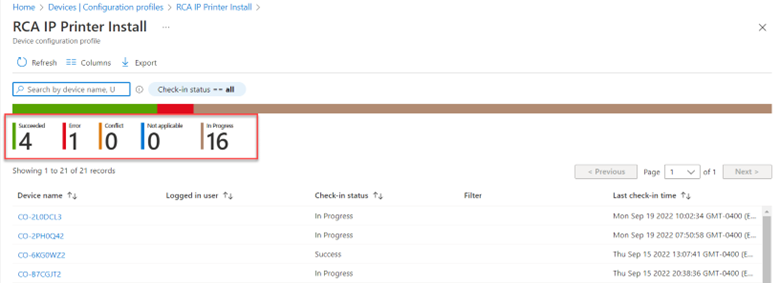
The final step is to assign the profile to the designated users. You can then monitor the status of the policy using Intune as shown below.

While Universal Print may not be a viable choice for large enterprises yet, it may be a good solution for SMBs that have moved to Azure AD in pursuit of a native cloud solution and want to deprecate their on-prem printing infrastructure.


Comments (0)